1. STIG Manager OSS Setup and Technical Information
The STIG Manager open-source project provides an API and Web Client designed for deployment in various environments - from single laptop demonstrations to enterprise-level orchestrations. While containerization is recommended for security, scalability, and maintenance benefits, the application supports multiple deployment methods to meet diverse organizational requirements.
Note
All deployments require integration with deployer-provided infrastructure services. This document provides configuration guidance while respecting that deployers will have varying needs and requirements for their specific implementations.
1.1. Architecture & Core Components

1.1.1. Required Components
Every STIG Manager deployment consists of:
- STIG Manager API (Core Component, provided by the STIGMan project)
RESTful API on Node.js LTS with Express framework
Stateless service exposing a single HTTP port
Handles all application logic and data operations
No persistent storage - all data flows to MySQL
- Web Client (User Interface, provided by the STIGMan project)
Single Page Application using ExtJS 3.4
Served as static content from the API container
Provides interactive access for users
- OpenID Connect (OIDC) Provider (Authentication Service, deployer-provided)
Manages user accounts and authentication
Issues OAuth2 JWT tokens for API access
Tested providers: Red Hat Keycloak, Okta, F5, Azure Entra
Must support Authorization Code Flow with PKCE for web clients
- MySQL Database (Data Persistence, deployer-provided)
Stores all application data
Supports TLS and mutual TLS authentication
Version 8.4+ recommended for optimal performance
Deployer responsible for backups and security
Important
STIG Manager provides only the API and Web Client. All other components (OIDC Provider, MySQL, reverse proxy) must be provisioned and configured according to your organizational requirements and security policies.
1.1.2. Recommended Infrastructure
- Reverse Proxy/Load Balancer (Recommended, deployer-provided)
Required for mTLS/CAC/PKI client certificate authentication
May be required by environmental or security policies
Must support streaming responses and Server-Sent Events (SSE)
Examples: nginx, Apache, HAProxy, Kubernetes Ingress
Note: STIG Manager supports native TLS - reverse proxy not required for basic HTTPS
- Container Orchestration (Recommended Deployment Method, deployer-provided)
Docker, Kubernetes, OpenShift, or similar
Enables scalability and high availability
Simplifies updates and rollbacks
Sample orchestrations available for reference
1.2. Critical Configuration Requirements
Before deploying STIG Manager, ensure your infrastructure meets these essential requirements:
1.2.1. Database Configuration
MySQL 8.0+ is required with proper configuration for performance and security.
- Key Requirements:
Dedicated database/schema with appropriate grants
Buffer pool sized for your deployment (8GB minimum)
TLS support for secure connections
Regular backup strategy
1.2.2. Authentication (OIDC) Configuration
STIG Manager requires an OpenID Connect provider for authentication and authorization.
- Key Requirements:
Support for Authorization Code Flow with PKCE
Proper JWT claims configuration (username, privileges, scopes)
CORS configuration if OIDC and API are on different domains
User privilege mapping (admin, create_collection, user roles)
1.2.3. TLS and Proxy Configuration
Important
The STIG Manager Web Client requires a secure context (HTTPS) to function. For non-localhost connections, you must configure either native TLS or deploy behind a reverse proxy providing HTTPS. Localhost connections (127.0.0.1, ::1) can use HTTP.
STIG Manager supports native TLS connections configured via environment variables. A reverse proxy is only required for mTLS/CAC authentication or when mandated by environmental requirements.
- Native TLS:
Configure HTTPS directly using environment variables
No reverse proxy needed for basic TLS encryption
See Environment Variables beginning with
STIGMAN_API_TLS_*for TLS configuration options
- Reverse Proxy (when required):
Required for mTLS/CAC/PKI client certificate authentication
Must support streaming responses and Server-Sent Events (SSE)
Must handle unbuffered responses for specific endpoints
See Proxy configuration for details
1.3. Additional Suggested Configuration
1.3.1. Customize Welcome Message and Logo
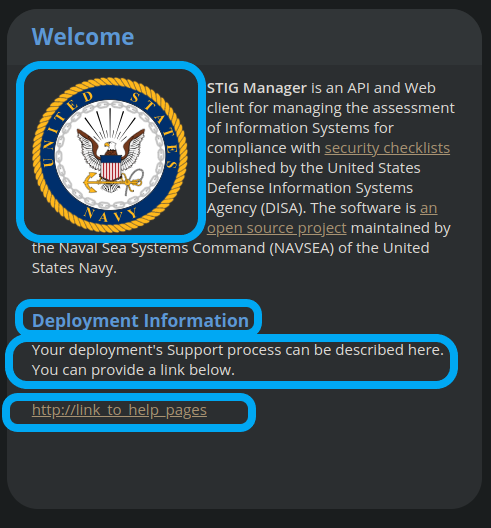
The Welcome Message and Image can be customized with environment variables to present additional information or guidance to users upon login. These variables all begin with STIGMAN_CLIENT_WELCOME_. See the Environment Variables reference for more information.
1.3.2. Add Extra CA Certificates
If your deployment requires trusting additional Certificate Authorities (CAs) beyond those built into Node.js, you can provide these via a file. You might do this if the API is connecting to an OIDC Provider using https. You can set these specifically for STIG Manager by using the STIGMAN_OIDC_CA_CERTS environment variable to point to a file containing the additional CA certificates in PEM format. See Environment Variables for TLS configuration options.
Alternatively, set the NODE_EXTRA_CA_CERTS=file-path Node.js environment variable to direct Node itself to accept CA certificates you have provided, in addition to its built-in CA certs. If using containers and an external CA file, ensure this file is mounted into the container at that path.
Iron Bank images include DoD certificates at: /etc/pki/ca-trust/source/anchors/Certificates_PKCS7_v5.7_DoD.pem
Check the Node.js documentation for more information.
1.3.3. Logging and Monitoring
STIG Manager outputs structured JSON logs to STDOUT for collection by your logging infrastructure.
1.3.4. Security Hardening
For deployments requiring compliance with security frameworks:
- Key Areas:
Container security and image scanning
ASD STIG compliance considerations
Data flow and access control validation
TLS configuration for all components
1.3.5. Essential Environment Variables
- STIG Manager is configured via Environment Variables
passed to the API container or process. At minimum, configure:
- Database Connection:
STIGMAN_DB_HOST- MySQL server addressSTIGMAN_DB_PORT- MySQL port (default: 3306)STIGMAN_DB_USER- Database usernameSTIGMAN_DB_PASSWORD(unless using TLS for authentication)STIGMAN_DB_TLS_CA_FILE- CA certificate file for TLS connection to DBSTIGMAN_DB_TLS_CERT_FILE(unless using password for authentication)STIGMAN_DB_TLS_KEY_FILE(unless using password for authentication)
- OIDC Integration:
STIGMAN_OIDC_PROVIDER- OIDC discovery URL for APISTIGMAN_CLIENT_OIDC_PROVIDER- OIDC URL for Web Client (if different)
- API Configuration:
STIGMAN_API_ADDRESS- API bind addressSTIGMAN_API_PORT- API port (default: 54000)STIGMAN_CLASSIFICATION- System classification banner
1.3.6. Sample Orchestrations
The project provides reference implementations demonstrating these configurations:
Docker Hub Quick Start - Basic orchestration with Keycloak and MySQL
CAC Authentication Sample - Full setup with nginx proxy and CAC support
1.4. Deployment Scenarios
Choose a deployment method based on your infrastructure and requirements:
1.4.1. Quick Start with Docker Compose
For demonstration or development environments, use our Docker Hub Quick Start orchestration.
Includes: STIG Manager API, Web Client, Keycloak, MySQL
Requirements: Docker and Docker Compose
1.4.2. CAC Authentication Deployment
For deployments requiring CAC/PKI authentication, see the STIGMan Orchestration repository.
Includes: Full stack with nginx proxy configured for CAC
Requirements: Docker Compose, PKI certificates
1.4.3. Individual Container Deployment
Deploy STIG Manager using Docker or any container runtime. Suitable for Kubernetes, OpenShift, or standalone Docker hosts.
Requirements:
Container runtime (Docker, Podman, etc.)
Configured OIDC Provider and MySQL database
Network connectivity between components
Basic Steps:
Pull the image:
docker pull nuwcdivnpt/stig-manager:latest-ironbankConfigure environment variables for your infrastructure
Run the container:
docker run --name stig-manager -d \
-p 54000:54000 \
-e STIGMAN_DB_HOST=<DATABASE_IP> \
-e STIGMAN_OIDC_PROVIDER=<OIDC_URL> \
nuwcdivnpt/stig-manager
Verify startup in logs:
docker logs stig-manager
See Authentication Example - RedHat Keycloak 19 and Database - MySQL Latest 8.x for detailed component setup.
1.4.4. Deployment from Source Code
Run STIG Manager directly from source code using Node.js. Suitable for development or non-containerized environments.
Requirements:
Node.js LTS
Configured OIDC Provider and MySQL
Git (recommended)
Basic Steps:
Clone repository:
git clone https://github.com/NUWCDIVNPT/stig-manager.gitNavigate to
/api/sourceInstall dependencies:
npm ciSet environment variables
Start application:
node index.js
Tip
Use a process manager like PM2 for production deployments from source.
1.4.5. Deployment with Precompiled Binaries
Deploy using precompiled executables without requiring Node.js runtime.
Requirements:
Platform-specific binary from releases
Configured OIDC Provider and MySQL
Basic Steps:
Download binary for your platform
Set environment variables
Run the executable
Tip
Use a process manager for production deployments.
1.4.6. Updating STIG Manager
Updates are straightforward due to the stateless API design:
Deploy the new version with the same configuration
The API will automatically handle any database migrations
Check release notes for migration warnings on large datasets
Warning
Downgrading requires database restoration from a backup. Always backup before updates.
1.5. First Steps
1.5.1. Configure Users
Users are not created in the STIG Manager application itself. All users must be created and authenticated by your Authentication Provider (often, Keycloak), which must provide the appropriate tokens, scopes, and privileges before they can access the system. Upon first access after successful Authentication, STIGMan will create a user profile to which it assigns Collection Grants and assignments.
User privileges are controlled by the OIDC Provider. This can be done by configuring the OIDC provider to generate tokens for Users that include their privileges and scopes in the specified claims (STIGMAN_JWT_PRIVILEGES_CLAIM and STIGMAN_JWT_SCOPE_CLAIM). In most OIDC Providers, this can be done in multiple ways, depending on your use case. One option for Keycloak is using the “Role Mappings” tab for that user, or you can set these privileges as defaults using the Configure->Roles->Default Roles interface. See the Authentication and Identity section for more information.
Assign at least one User the admin privilege when setting up STIG Manager for the first time.
User Type |
Privileges |
Keycloak Roles |
|---|---|---|
Administrator User |
Access STIG Manager, Manage Collections, Import STIGs, Manage Users, Import/Export App data |
admin, user |
Collection Creator User |
Access STIG Manager, Create Collections |
user, create_collection |
User |
Access STIG Manager |
user |
Note
All Users must be explicitly granted access to Collections in order to see the Assets, STIGs, and Evaluations contained therein. Administrators can grant themselves or others access to any Collection.
It is recommended that most users should be “Collection Creator Users”(ie. assigned the “create_collection” privilege). Collection Creator Users can create and manage their own collections, as well as be assigned grants from other users.
STIG Manager will automatically create its own user associations for Collection grants once an authenticated user accesses the system. User Privileges (ie. “admin” and/or “create_collection”) are visible in the User administrative tab, but must be managed in the Authentication Provider. Specific Grants to Collections and Assets/STIGs are managed in the STIG Manager app.
1.5.2. Import STIGs
Up until this point, the setup has concerned the actual operational deployment of the app. For this function, and additional functions of the App, STIG Manager Users are required. See the User for more information on their different roles and privileges.
Download the latest quarterly STIG Library Compilations from DISA and import it into STIG Manager.
Log in to STIG Manager using an Administrator user to import STIGs. For information on how to do this, and other STIG Manager Admin functions, see the STIG Benchmarks portion of the STIGMan Application Manager (Administrator) Walkthrough.
For additional information about getting started with STIG Manager, see the Admin Walkthrough.